A transmission oil pressure switch, also commonly known as a line pressure switch, is used on transmissions with hydraulic fluid under pressure. Vehicles that have automatic transmissions whether it is front wheel drive or all wheel drive, have an oil pressure switch.
The transmission oil pressure switch is designed to communicate with the computer of the vehicle with measurable pressures developed from the pump. If the filter in the oil pan becomes clogged, the pump will develop less flow, creating less pressure to the switch. The switch will tell the computer to default the transmission into a gear with the least amount of pressure without any damage. This condition is known as limp mode. The transmission usually will be stuck in second or third gear, depending on how many gears the transmission is equipped with.
The switch also lets the computer know if there is an event of pressure loss. During a pressure loss, the computer will shut off the engine to prevent any damage to the pump. Transmission pumps are the heart of the transmission and can cause more damage to the transmission if it was to operate under engine power without lubrication.
Part 1 of 7: Understand how the transmission oil pressure switch works
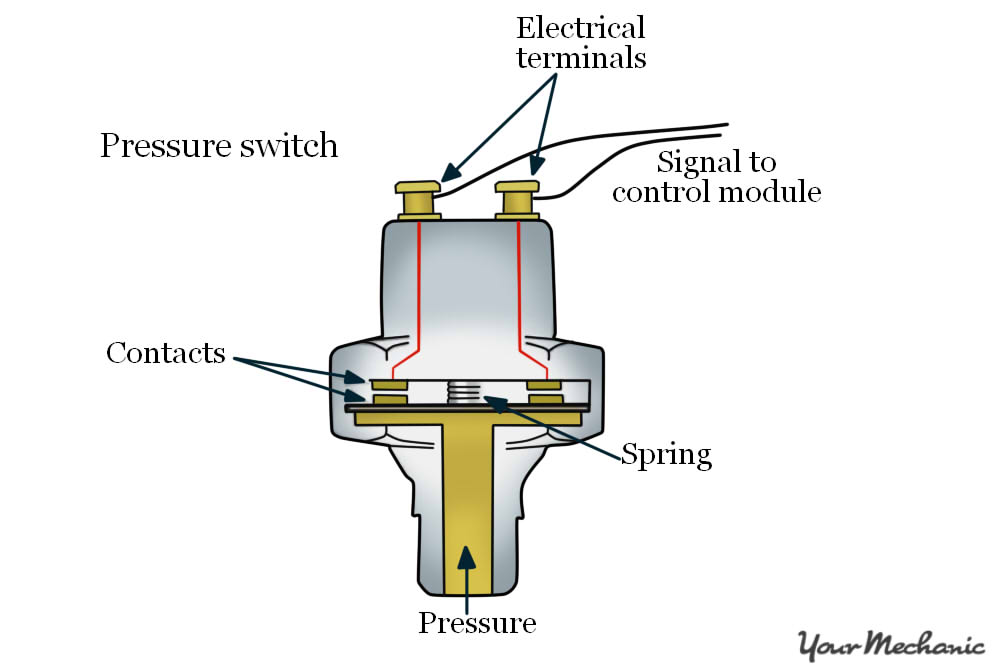
The transmission oil pressure switch has contacts within its housing. Inside there is a spring to keep the contacts bridge away from the positive and ground contacts. On the other side of the spring is a diaphragm. The area between the inlet port and the diaphragm are full of hydraulic fluid, usually automatic transmission fluid, and the fluid is under pressure when the transmission is operative.
The types of transmission oil pressure switches are:
- Clutch pressure switch
- Pump pressure switch
- Servo pressure switch
The clutch pressure switch is located on the housing next to a clutch pack location. The clutch switch communicates to the computer and provides details like the pressure to hold the clutch pack, the duration of the pressure hold, and when the pressure has released.
The pump pressure switch is located on the transmission housing next to the pump. The switch lets the computer know what the pressure is coming from the pump when the engine is running.
The servo pressure switch is located on the housing near a band or servo in the transmission. The servo switch monitors when a band has operated by hydraulically moving the servo under pressure, the duration of the pressure hold on the servo, and when the pressure has released from the servo.
- Note: There may be more than one oil pressure switch for clutch packs and servos. During the diagnostic procedure, you may have to check the resistance on all of the switches to determine which one has failed, if the engine light code does not specify any details.
The signs of transmission oil pressure switch failure are:
A transmission may not shift when the oil pressure switch has failed. The symptom of the transmission not shifting prevents the fluid from getting too hot.
If the switch has failed completely for the pump, the engine may not start to prevent dry pump rotations. This helps prevent premature failure of the oil pump.
The engine light codes associated with the transmission oil pressure switch failure are:
Part 2 of 7: Check the condition of the transmission oil pressure switches
Step 1: Try to start the engine. If the engine starts up, put it in drive and see if the transmission makes the vehicle move slowly or quickly
Step 2: If you can drive the vehicle, drive the vehicle around the block. See if the transmission will shift or not.
- Note: If you have a constant velocity transmission, you will have to use a pressure adapter hose to check the fluid pressure. During a test drive, you will not feel any shifting of the transmission. The transmission uses electronic belts submerged in hydraulic fluid to shift gears, so you would not be able to feel any shift.
Step 3: Check the harness under the vehicle. After a test drive, look under the vehicle to see if the harness to the transmission oil pressure switch is broken or unplugged.
Part 3 of 7: Prepare to replace the transmission position sensor
Materials needed
- Allen wrench set
- Boxed end wrenches
- Jack stands
- Flash light
- Flat tip screwdriver
- Floor jack
- Protective gloves
- Protective clothing
- Ratchet w/metric and standard sockets
- Safety glasses
- Torques bit set
- Wheel chocks
Step 1: Park your vehicle on a flat, hard surface. Make sure that the transmission is in park mode (for automatics) or in 1st gear (for manuals).
Step 2: Secure the wheels. Place wheel chocks around the tires that will remain on the ground. In this case, place the wheel chocks around the front tires since the rear of the vehicle will be lifted up.
Engage the parking brake to the lock the rear tires from moving.
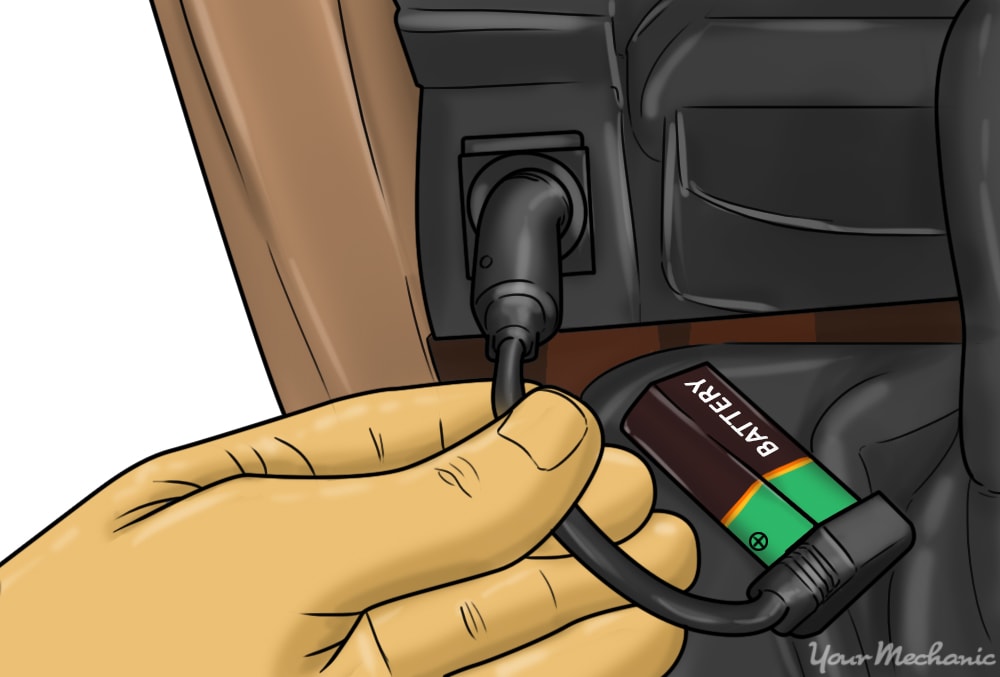
Step 3: Install a nine volt battery saver into your cigarette lighter. This will keep your computer live and keep your setting current in the vehicle. If you do not have a nine volt battery saver, you can skip this step.
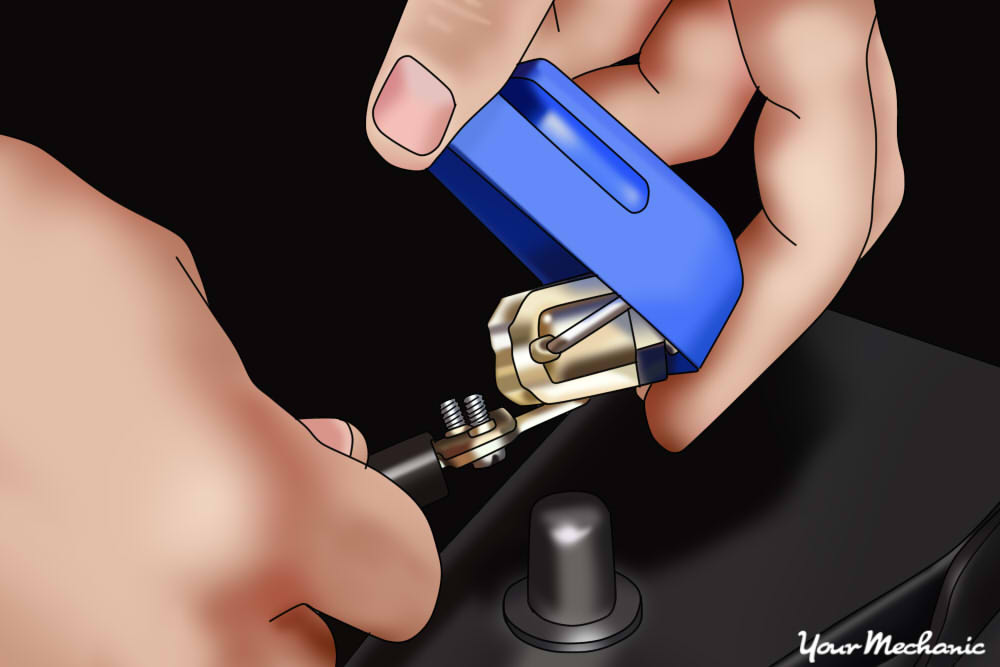
Step 4: Disconnect the battery. Open the vehicle’s hood and disconnect the car’s battery. Take the ground cable off the battery’s negative post to disable the power going to the transmission oil pressure switch.
Disabling the engine starting source prevents any fluid leaking under pressure.
- Note: It is important to protect your hands. Make sure to put on protective gloves prior to removing any battery terminals.
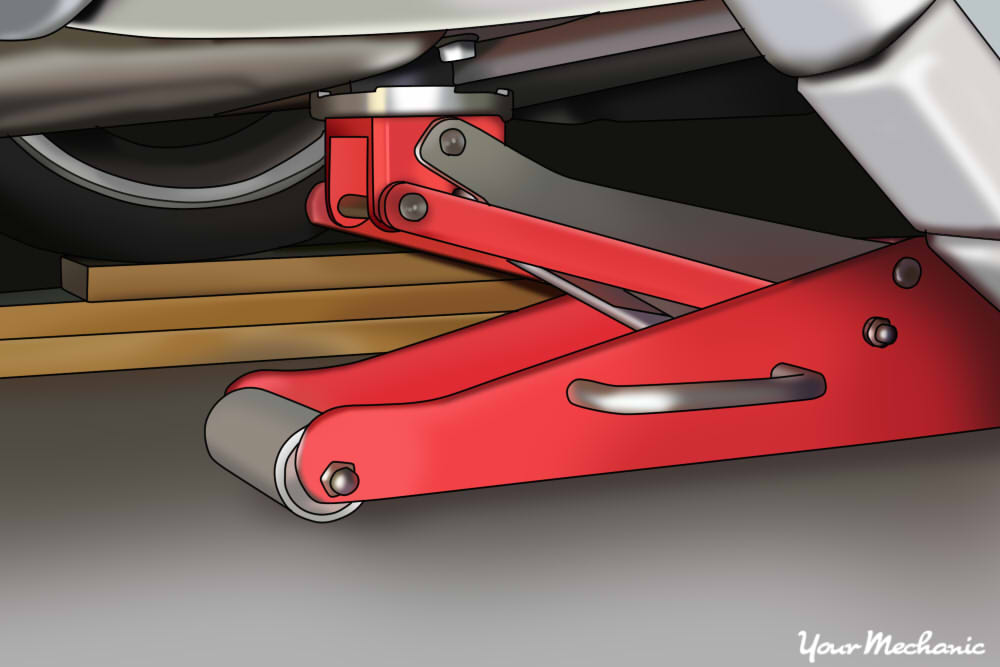
Step 5: Raise the vehicle. Using a floor jack that is recommended for the weight of the vehicle, lift the vehicle at its specified jacking points until the wheels are completely off the ground.
- Note: It is always best to follow the recommendations given in the owner’s manual of your vehicle and use the jack at the proper jacking points for your vehicle.

Step 6: Place the jack stands. The jack stands should go under the jacking point locations. Then lower the vehicle onto the jack stands.
- Tip: For most modern cars, the jacking points for jack stands will be on the pinch weld just under the doors along the bottom of the car.
Part 4 of 7: Remove the transmission oil pressure switch
Step 1: Take safety precautions. Put on protective clothing, oil resistant gloves, and safety glasses.
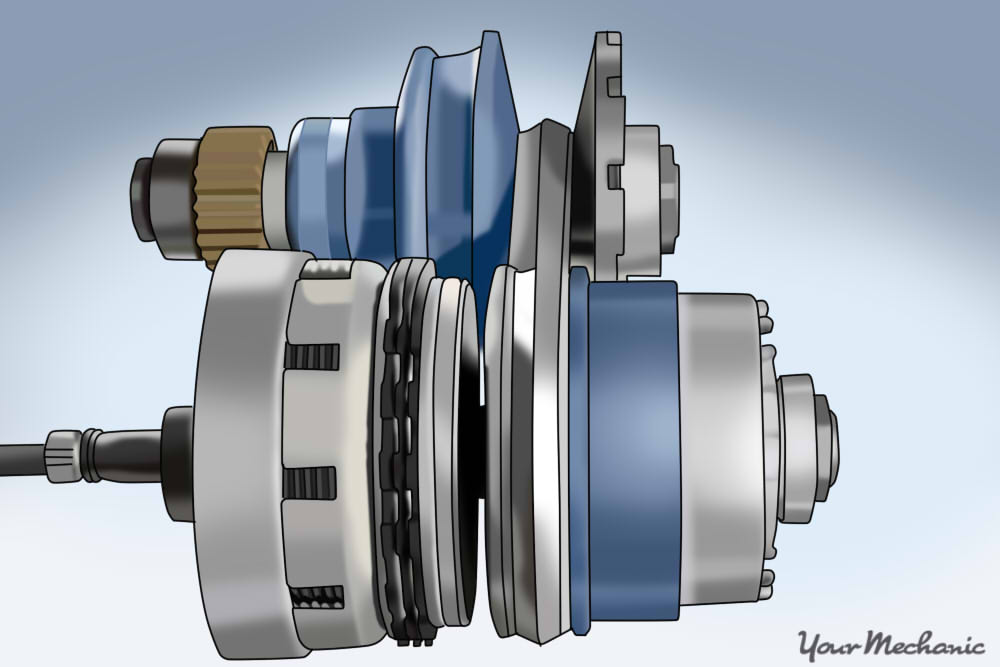
Step 2: Grab a creeper, flashlight, and tools for the job. Slide under the vehicle and locate the transmission oil pressure switch.
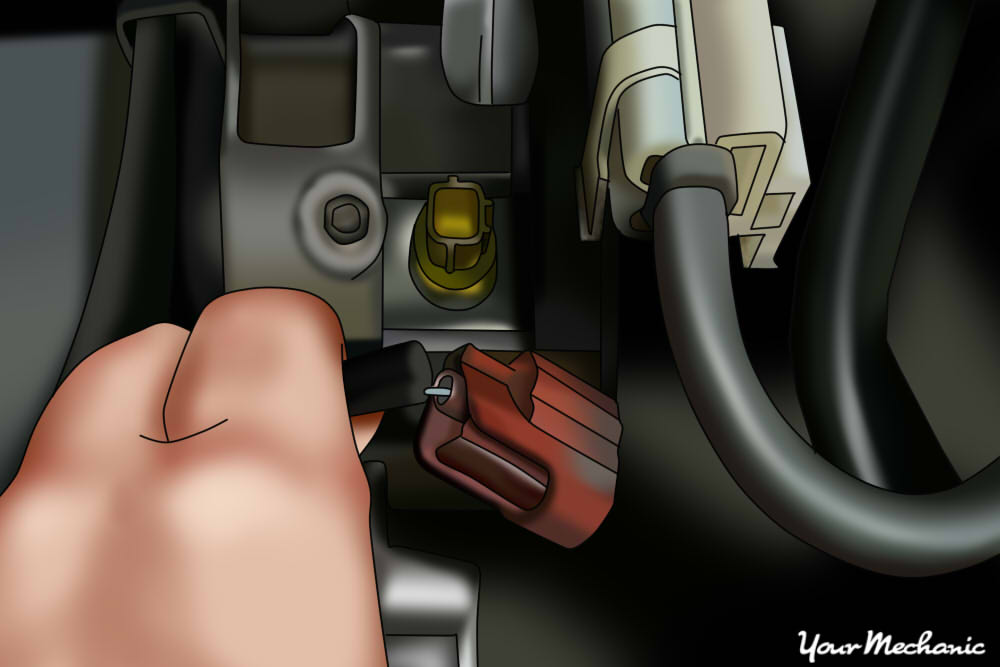
Step 3: Remove the harness from the switch. If the harness has brackets securing it to the transmission, you may have to remove the brackets to get the harness out of the way from the switch mounting hardware.
Step 4: Remove the mounting bolts that secure the switch to the transmission. Use a large flat screwdriver and lightly pry the switch off the transmission.
Part 5 of 7: Install the new transmission oil pressure switch
Step 1: Get the new switch out. Put the new switch onto the transmission.
Step 2: Install the mounting bolts to the switch. Tighten them down hand tight. Torque the bolts to 8 foot-pounds.
- Note: Do not over tighten the bolts or you will crack the new switch housing.
Step 3: Plug in the harness to the switch. If you had to remove any brackets holding up the harness to the transmission, make sure you reinstall the brackets.
Part 6 of 7: Lower the vehicle and hook up the battery
Step 1: Clear up your tools. Collect all tools and your creeper and place them out of the way.
Step 2: Raise the vehicle. Using a floor jack that is recommended for the weight of the vehicle, lift under the vehicle at its specified jacking points until the wheels are completely off the ground.
Step 3: Remove the jack stands. Remove the jack stands and keep them far away from the vehicle.
Step 4: Lower the vehicle. Lower the vehicle to where all four wheels are on the ground. Pull out the jack and put it aside.

Step 5: Reconnect the battery. Open the vehicle’s hood. Reconnect the ground cable back onto the battery’s negative post.
Remove the nine volt battery saver from the cigarette lighter.
Tighten up the battery clamp to ensure that the connection is good.
- Note: If you did not use a nine volt battery saver, you will have to reset all of the settings in your vehicle, like your radio, electric seats, and electric mirrors.
Step 6: Remove the wheel chocks. Remove the wheel chocks from the rear wheels and put them aside.
Part 7 of 7: Test drive the vehicle
Material needed
- Flashlight
Step 1: Drive the vehicle around the block. While you are driving around, check to see if the engine light comes back on after replacing the transmission oil pressure switch.
Also, check and make sure that the transmission is shifting correctly and not stuck in limp mode.
Step 2: Check for oil leaks. When you are done with the test drive, grab a flashlight and look under the vehicle for any leaking oil.
Make sure that harness to the switch is free from any obstacles and that there is no oil leaking.
If your engine light comes back on, the transmission will not shift, or if the engine will not start up after replacing the transmission oil pressure switch, then there may be further diagnosis of the transmission oil pressure switch circuitry.
If the problem persists, then you should seek out help from one of the certified technicians at YourMechanic and get the transmission inspected.