Removing the head is a major step in removing the cylinder head. These head bolts hold the cylinder head to the engine block. The head bolts are long bolts that go through the cylinder head and head gasket and when torqued properly create a seal between all 3 components. This seal allows compression to build in the cylinders and the engine to fire.
Cylinder heads come in many different configurations that each have their own specific steps to remove. There are two types of removal: head bolts from a pushrod style motor and the overhead cam style engine. Each one has differences but the tools used will be similar and the precautions the same. If the situation feels uncomfortable or is on an advanced engine, please consider consulting a qualified mechanic.
Part 1 of 3: Getting to the head bolts
Materials Needed
- Eye protection
- Gloves
- Oil and coolant drain
- Parts cleaner or brake cleaner
- Shop rags
- Socket set and ratchet
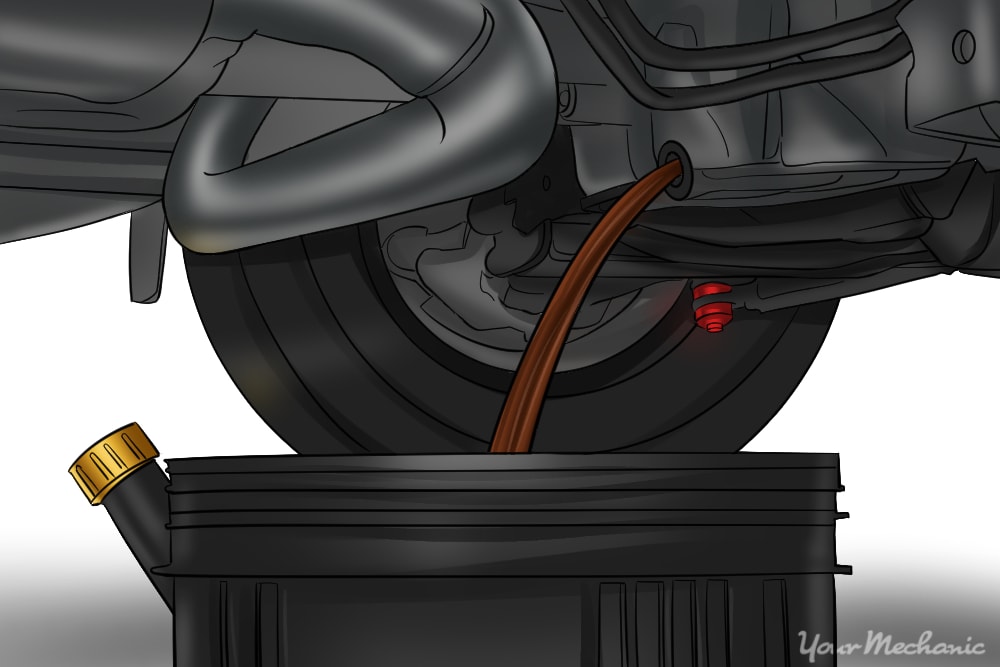
Step 1: Drain the oil and coolant. Put on your eye protection and gloves and drain the oil from the vehicle.
Make sure the vehicle can not be started by removing the negative cable from the battery. Next the coolant will need to be drained so it does not leak when the head bolts are loosened.
Step 2: Clean valve cover. Use some of the parts cleaner or brake cleaner to clean up the valve cover and as much of the cylinder head as is reasonable.
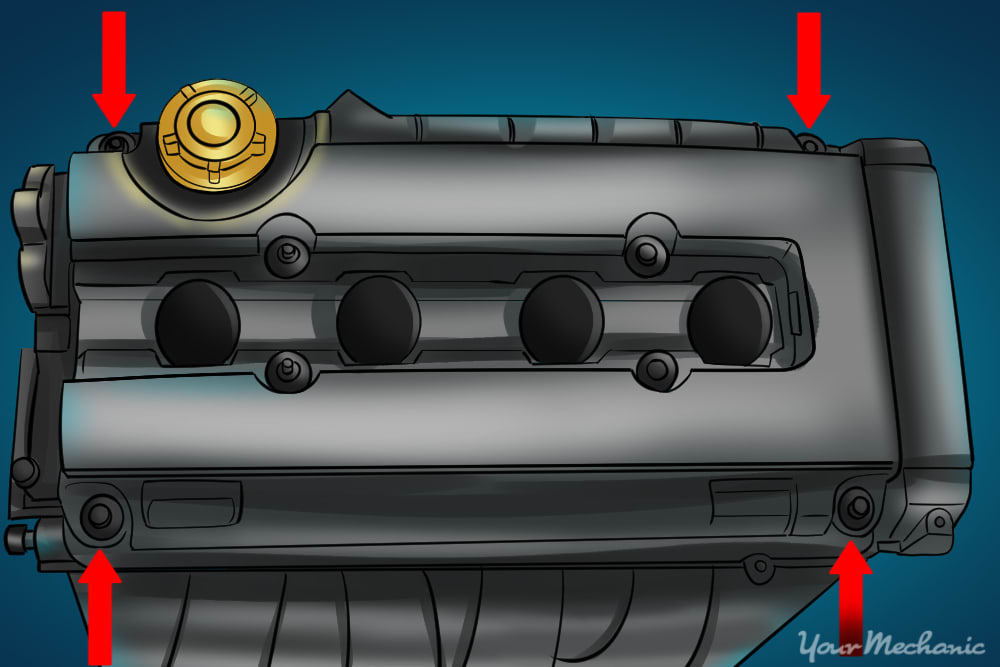
Step 3: Remove valve cover. If necessary, remove other components to make the valve covers accessible, and start removing the bolts from the valve cover.
Once all bolts are removed carefully removed the valve cover from the cylinder head. If any valve cover gasket material remains, remove it at this time and clean any excess oil from the edges. Set the valve cover aside carefully as it will be reused with a new gasket once repairs are completed.
Part 2 of 3: Pushrod engine head bolt removal
Materials Needed
- Head bolt socket (if needed)
- Numbered cardboard
- Rubber hammer
- Socket set and ratchet
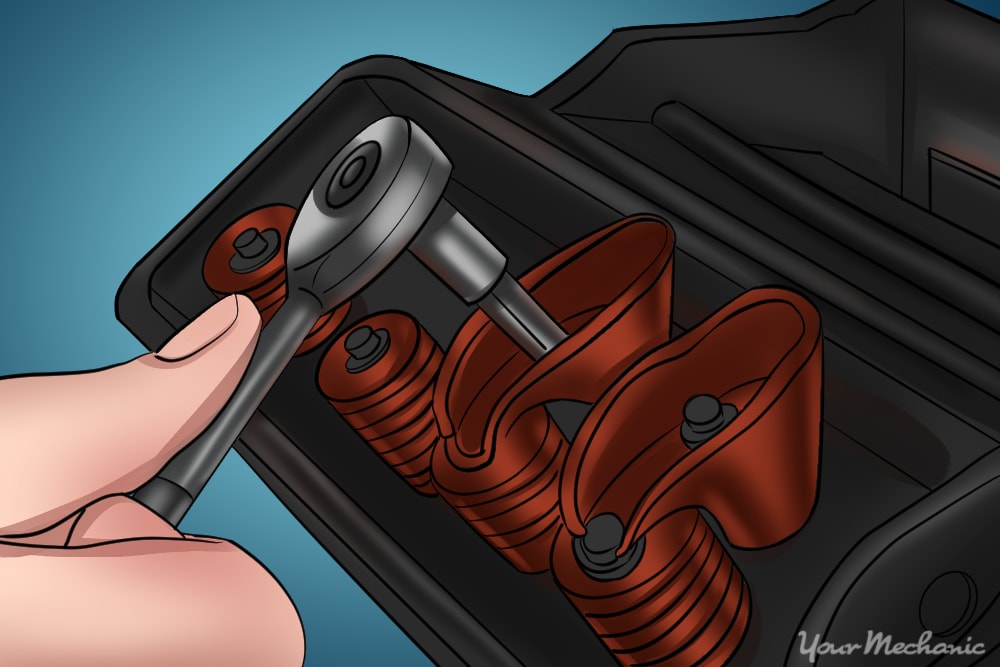
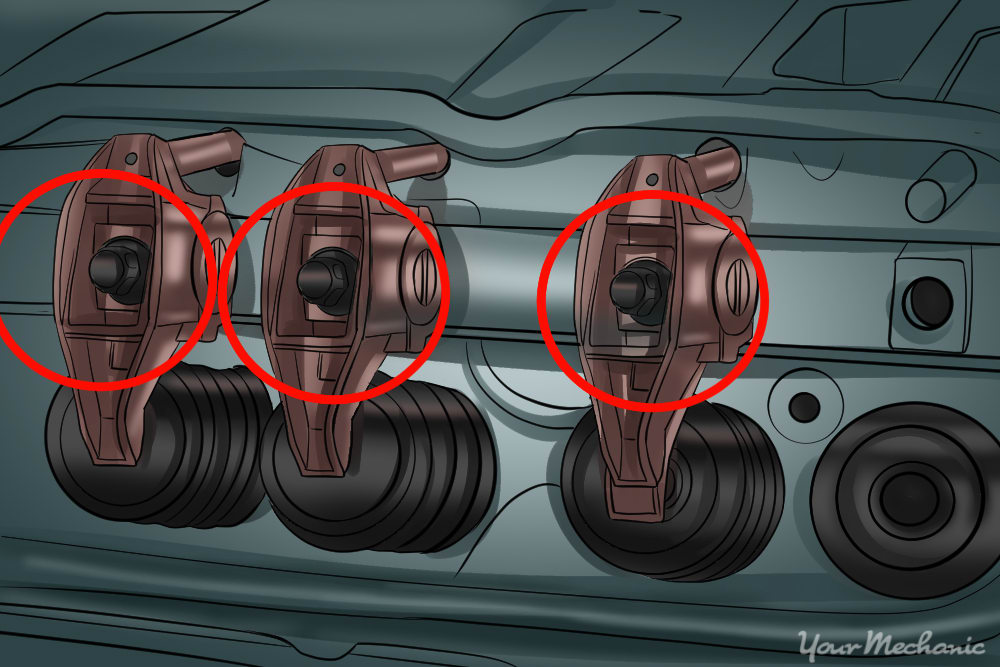
Step 1: Rocker arm and rocker removal. A pushrod engine has long pushrods that protrude through the cylinder head and attach to the rocker rail.
The rocket arm will need to be loosened first. Many manufactures have a specific sequence for removal of the rocker arm bolts. After the rocker arm is removed, the rockers will be unbolted.
Set all rocker arms aside in the order they were removed as they should go back to the cylinder they were removed from.
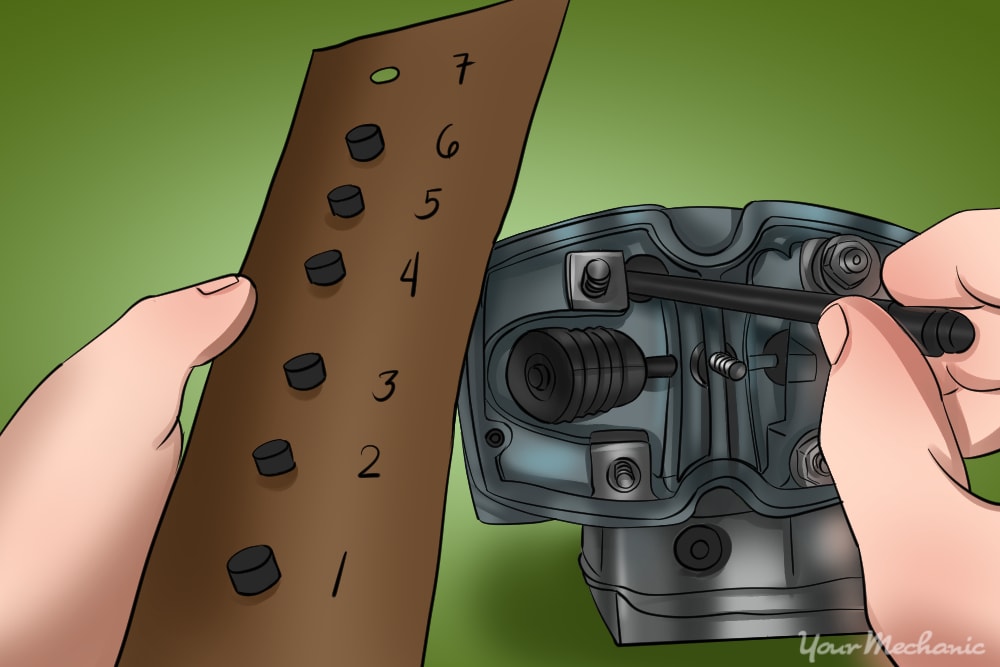
Step 2: Remove the pushrods. Remove the pushrods one at a time from the cylinder head.
Put them into a numbered piece of cardboard as the pushrods will go back into the same slot they came from.
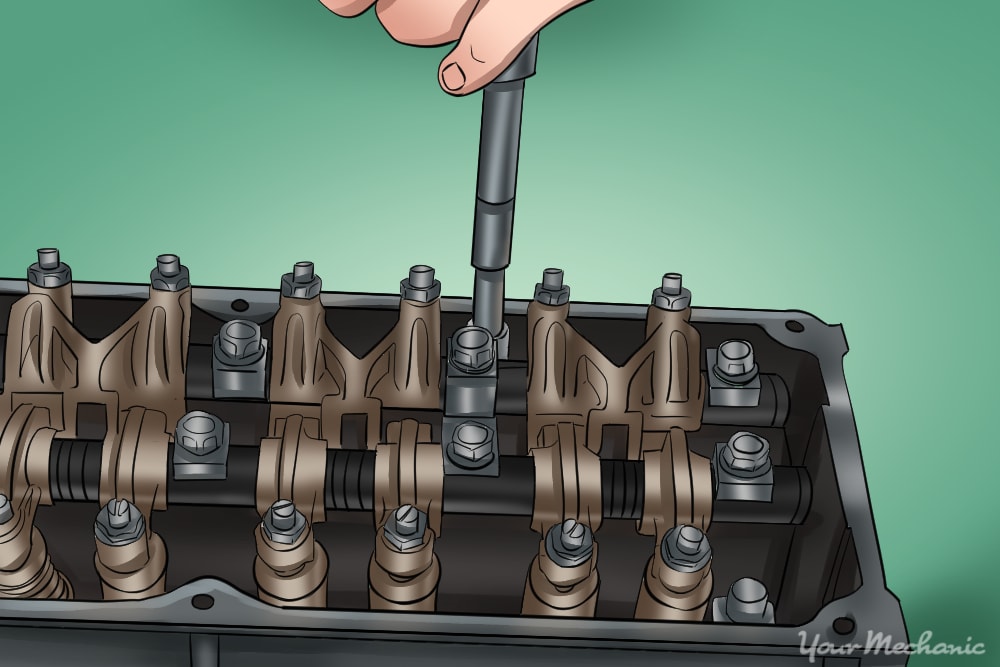
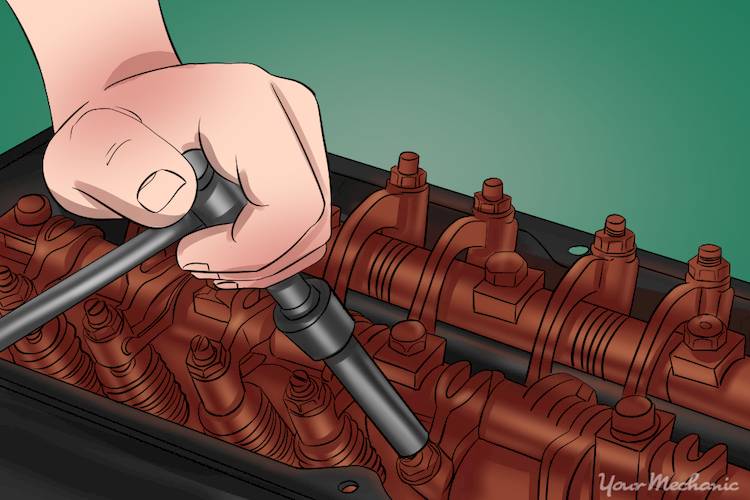
Step 3: Loosen head bolts. Use the ratchet begin to break the cylinder head bolts loose.
Each bolt will be loosened but not removed. Loosen all of the bolts before removing any of the the bolts all the way.
Step 4: Remove the bolts. Place each bolt through a numbered hole in the cardboard in case the head bolts are different lengths so they can be installed back into the proper hole.
The bolts may require a special socket depending on the manufacture.
Step 5: Lift off the cylinder head. Once all bolts are removed, lift up on the cylinder head gently; the head should come free easily.
If the cylinder head sticks, lightly use a dead blow or rubber mallet to tap the cylinder head to be able to remove it. Set to the side in a safe area.
- Warning: Cylinder head bolts have a specific sequence that is used when removing them. Consult the manufacturer's specifications for the proper removal sequence for the engine being worked on.
Part 3 of 3: Overhead cam head bolt removal
Material Needed
- Socket set and ratchet
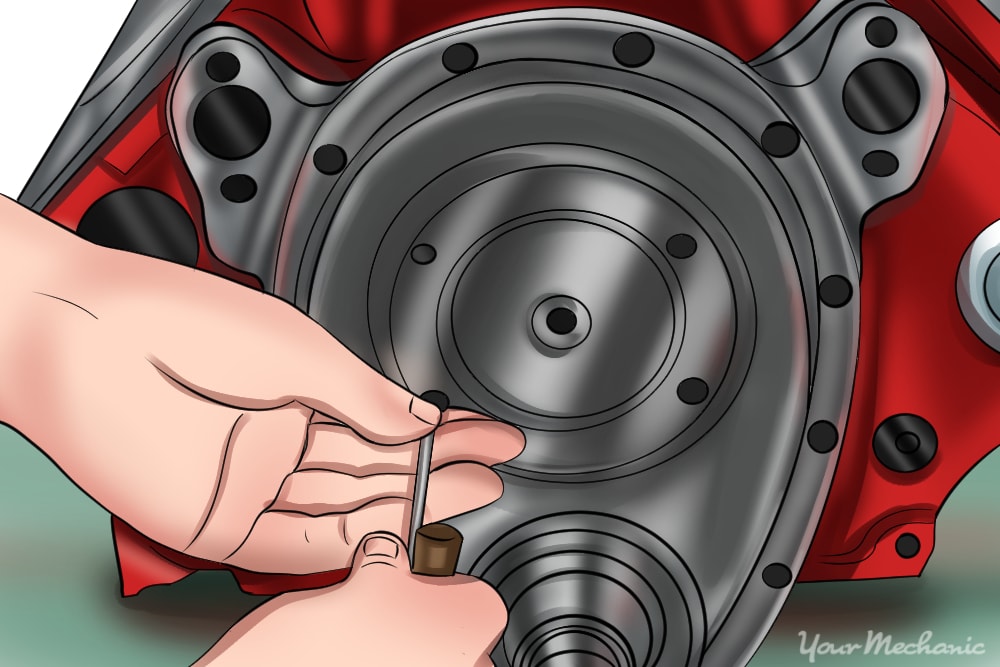
Step 1: Remove the timing cover. The timing cover will need to be removed to gain access to the timing belt or chain.
This is necessary because the cam shaft sits in the cylinder head and is attached to the crankshaft with either a timing belt or timing chain.
Step 2: Time the engine to remove the belt. The engine will need to be timed to avoid damage when the timing belt is removed.
Each engine is different and will have its own procedures to time. There should be marks on the camshaft and crankshaft that will be aligned to set the timing at top dead center (TDC).

Step 3: Remove the timing belt. The timing belt tensioner will be removed or released to take the tension off the belt.
Once the belt is loosened, it should be able to be slipped of the camshaft in the cylinder head.
Step 4: Remove the head bolts. Every engine will have its own procedures for the order that the head bolts are removed or tightened.
Loosen head bolts ¼ turn each in the order specified, which may require a special socket. Once all the bolts have been loosened they may be removed one at a time. The bolts must be organized or marked in case they are different lengths.
Step 5: Remove the cylinder head. Once all the bolts are removed, the cylinder head may be removed from the engine. If it is stuck, tap lightly on the side of the head with a rubber hammer to loosen the cylinder head.
- Warning: Most head bolts are torque-to-yield. These head bolts are single use only and once removed must be replaced. Torque-to-yield head bolts stretch when they are torqued to allow them to tighten properly and repeated application can cause the head bolt to break.
Removing the head bolts can seem like a daunting process but with care, following all the above steps, it can be done. Most of the time the cylinder head should only be removed when replacing the head gasket or performing a engine rebuild. At any point during removing the head bolts, if questions arise, Ask a Mechanic for some useful, quick advice.
