While all modern cars use computer-controlled fuel distribution systems, there are still many vehicles on the road that employ the traditional carbureted method of fuel delivery. Before electronically controlled fuel systems were developed, vehicles relied on mechanically operated fuel delivery systems, oftentimes in the form of carburetors to supply the engine with fuel.
While carburetors are not really considered commonplace anymore, for many decades they were the preferred method for fuel delivery, and working with them was a much more common occurrence. Although not many vehicles with carburetors remain on the road, it is imperative that the ones that do are properly tuned and adjusted to achieve optimum performance.
Carburetors can go bad for several reasons. However, adjusting the carburetor is a relatively simple job that can be done with a basic set of hand tools and a little bit of technical knowledge. This article shows you how to adjust the air fuel mixture and the idle air speed - the two most common adjustments made when tuning a carburetor.
Part of 1 of 1: Adjusting your carburetor
Materials Needed
- Safety glasses
- Screwdriver assortment
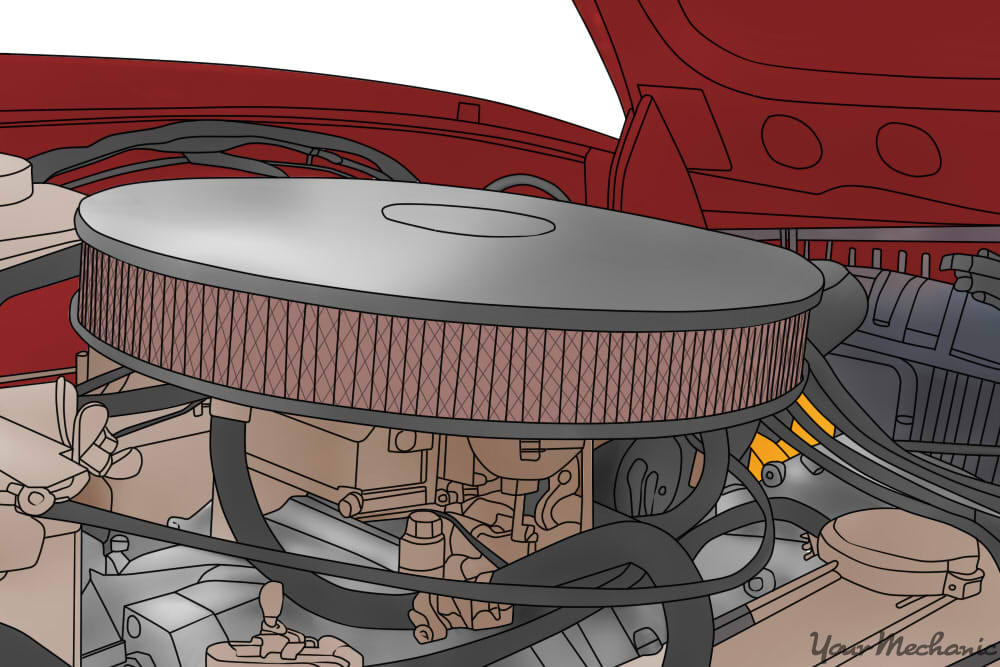
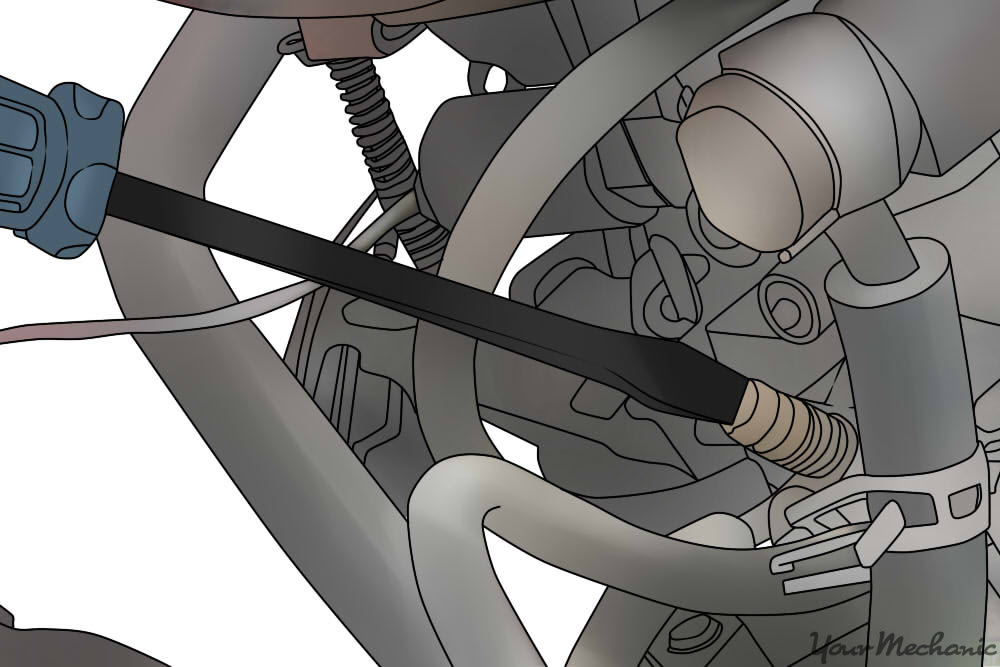
Step 1: Remove engine air filter. Locate and remove the engine air filter and housing in order to access the carburetor.
This may require the use of hand tools, however, many times the air filter and housing are secured using only a wing nut that can often be removed without using any tools.
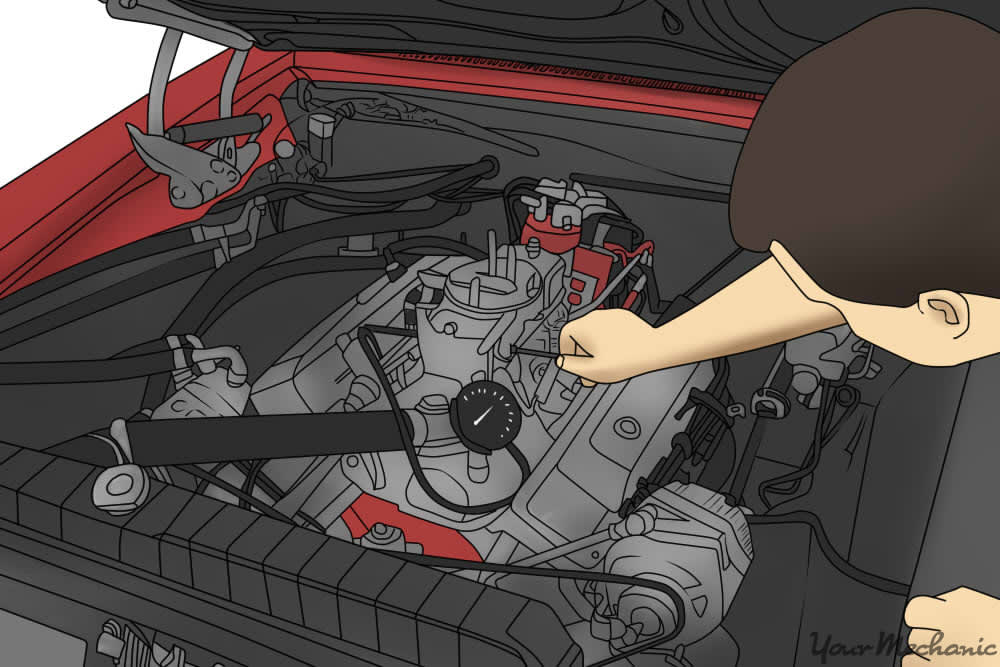
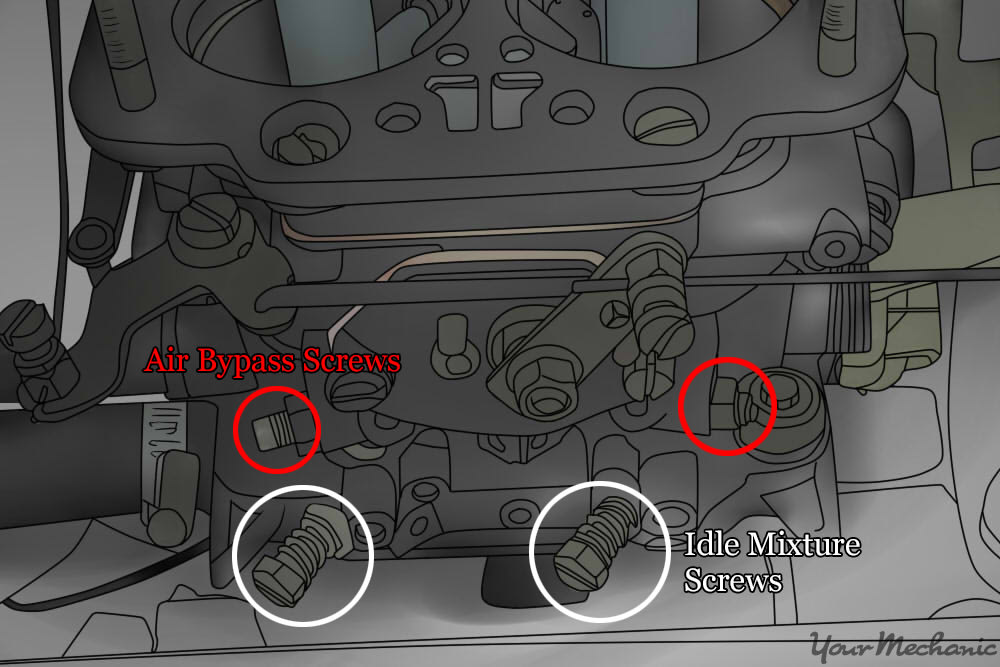
Step 2: Adjust the air fuel mixture. Use a flat head screwdriver to adjust the air fuel mixture.
Once the air filter has been removed, and the carburetor is exposed, locate the air fuel mixture adjustment screws, these are often plain, flat head screws.
Depending on the make and model of the vehicle, different carburetors may have multiple, sometimes up to four, air fuel mixture adjustment screws.
These screws are responsible for controlling the amount of fuel that enters the engine, and improper adjustment will result in decreased engine performance.
- Tip: Carburetors may have several screws, so refer to the service manual to ensure that you have correctly located the screws to avoid making incorrect adjustments.
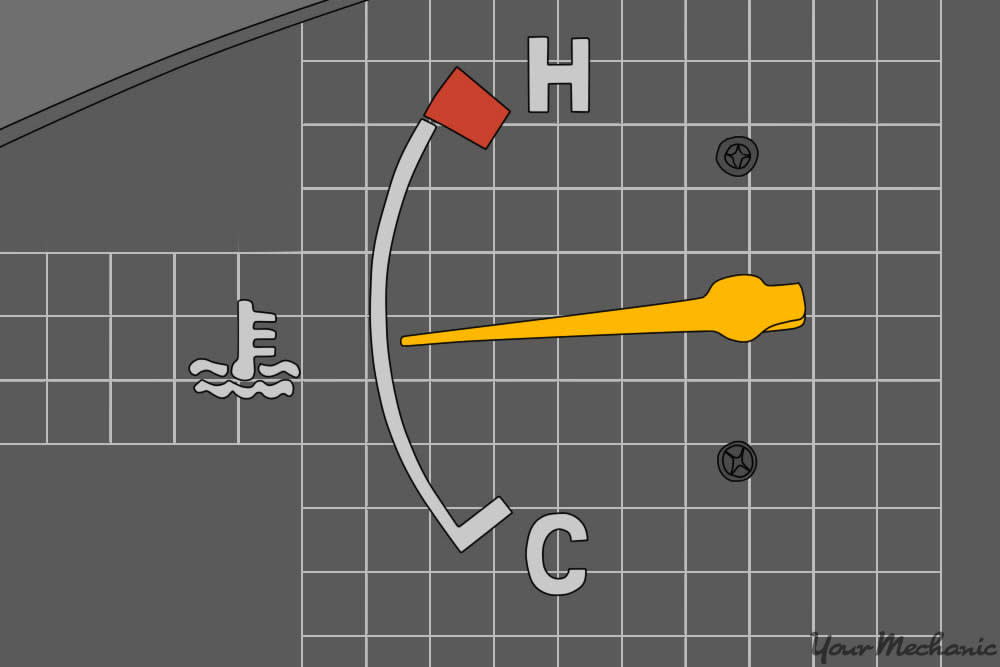
Step 3: Observe the engine’s condition. Start the vehicle and allow it to warm up to operating temperature.
Take note of the running condition of the engine. Use the table below to determine if the engine is running lean or rich.
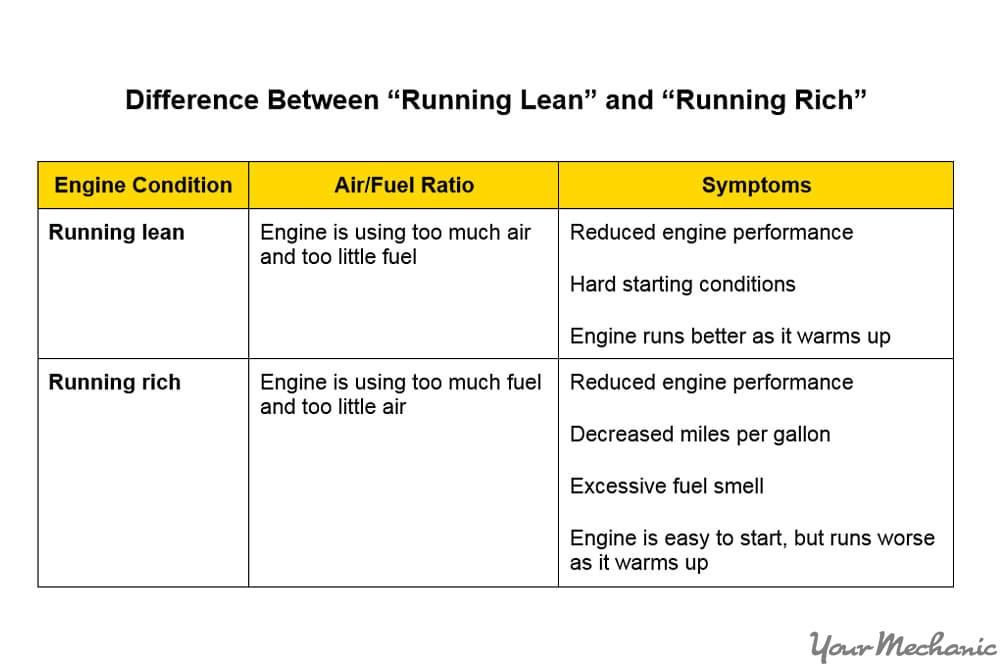
Discerning whether the engine is running lean or rich will help you make the proper adjustments for best engine performance. This will let you know if it is starved for fuel or is using an excessive amount.
- Tip: If you are still unsure about your engine’s condition, you may want to enlist the help a certified mechanic to inspect the engine to avoid making incorrect adjustments to the carburetor.
Step 4: Re-adjust air fuel mixture screws. Once the engine has arrived at operating temperature, go back to the carburetor and adjust the air fuel mixture screw, or screws.
Tightening the screw increases the amount of fuel, while loosening decreases the amount of fuel.
When making any adjustments, it is also important to make them in small increments of a quarter turn.
This will prevent any major fuel changes that could dramatically affect the performance of the engine.
Back the adjustment screws off until the engine is running slightly lean.
-
Tip: When the engine is running slightly lean the rpm will drop, the engine will begin to run rough, pop and sputter, until it stalls.
Back off the mixture screw until the engine just begins to display symptoms of a lean mixture, and then tighten them down, in quarter turn increments, until the engine runs smoothly.
- Tip: When the engine is running smoothly the idle speed will stay steady, and the engine will run in a smooth balanced manner, with no misfires, or shaking. It should also rev smoothly through the full rpm range with no misfires or shakes when you apply throttle.
Step 5: Test the engine at idle and while revving. Rev the engine up after every adjustment to see if it continues to run smoothly at higher rpms.
If you notice any vibration or shaking, continue to make adjustments until the engine runs smoothly both at idle and while revving, through the full rpm range.
Your throttle response should also be crisp and responsive. The engine should rev smoothly and quickly as soon as you apply throttle.
If the vehicle is displaying any sort of sluggish performance or misfires when you apply the throttle, then more adjustments are required.
- Warning: If there are multiple screws, it is important to try and adjust them all by the same amount of increments. Keeping all of the adjusted screws tuned as closely together as possible will ensure that the fuel is distributed into the engine as evenly as possible, yielding the smoothest performance and operation across all engine speeds.
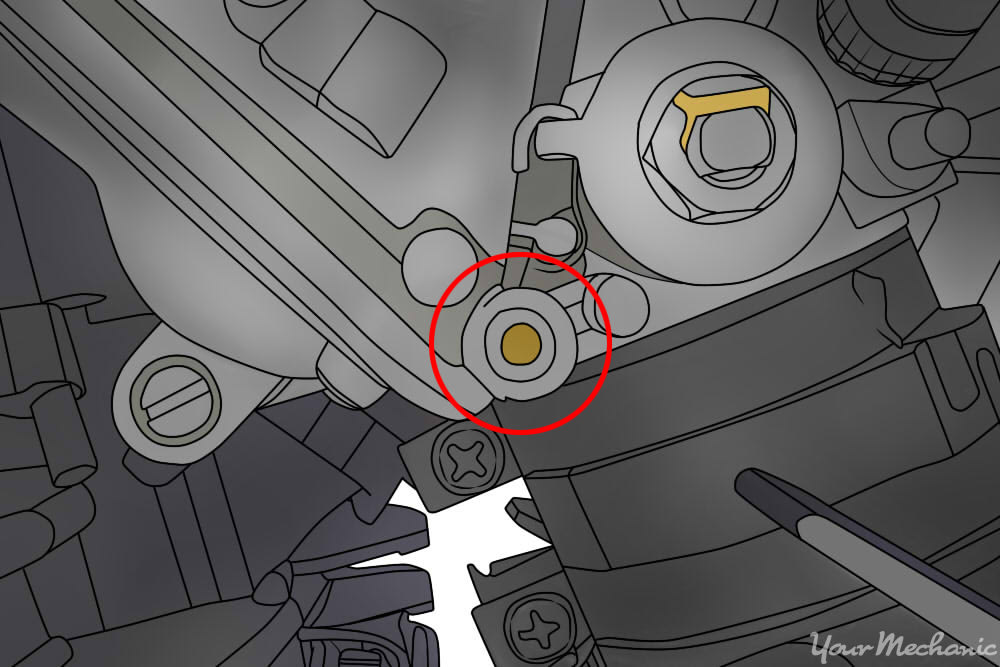
Step 6: Locate the idle mixture screw. Once the air fuel mixture screws have been properly adjusted, and the engine runs smoothly both at idle, and when revved, it is time to locate the idle mixture screw.
The idle mixture screw controls the air fuel mixture at idle speed, and often is located near the throttle plate.
- Tip: The exact location of the idle mixture screw can vary widely among makes and models, so refer to the owner’s manual if you aren’t certain where the idle mixture screw is. This will ensure that no incorrect adjustments are made that could negatively affect the engine’s performance.
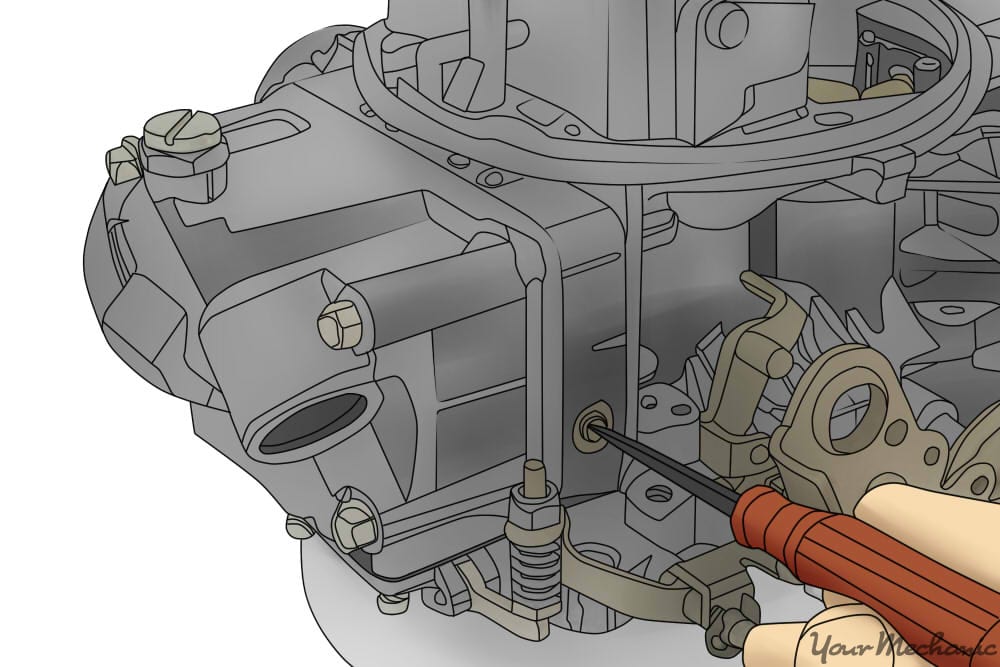
Step 7: Adjust idle mixture screw until you achieve a smooth idle. Once the idle mixture screw has been identified, adjust it until the engine is idling smoothly, with no misfires or shakes, and at the proper speed.
In much the same manner as making the air fuel mixture adjustment, back the idle mixture screw off into a lean condition, and then adjust it in quarter turn increments, until the desired idle speed is achieved.
- Tip: If you are not sure what the idle speed specification should be, refer to the owner’s manual for direction, or simply adjust the screw until the engine is idling at smoothly, and does not drop sharply in rpm, or stall out when revved from idle. Consider having a professional inspect your engine’s idle if you are still having problems.
Step 8: Reinstall the air filter and test drive the vehicle. Once all the adjustments have been made, and the engine is running smoothly across all engine speeds, reinstall the air filter and housing onto the carburetor, and test drive the vehicle.
Take note of any changes in the vehicle’s power output, throttle response, and fuel consumption. If need be, go back and make any required adjustments, until the vehicle is running smoothly.
All things considered, adjusting a carburetor is a relatively simple task that can be carried out on one’s own. However, if you are not comfortable making adjustments that are critical to your engine’s performance, this is a task that any professional technician, such as one from YourMechanic, should be able to perform. Our mechanics will be able to inspect and adjust your carburetor or even replace the carburetor if any severe faults are found.